Change annotation on select

Product: React SDK → @pdftron/webviewer

Product Version: 11.3.0

Please give a brief summary of your issue:
We want to use a different annotation by default to show the position of the annotation and when we select that component we want to show the original annotation drawing.

Please describe your issue and provide steps to reproduce it:

  • The user can create annotations by drawing on the canvas, the drawings are predefined and can be selected on our platform. The drawings that can be used: rectangle, circle, line, arrow.
  • When the annotation is made we want to draw another annotation on the canvas by default as a marker to show the user where the annotation is placed.
  • When the user selects an annotation we want to show the original annotation that was drawn instead of the marker.

Picture:

As you can see on the picture we have 2 types of annotations there.

  • The one on the left (the bubble with user avatar inside) is the marker we want to display when the annotation is not selected.
  • The one on the right (red rectangle) is the actual annotation that was drawn by the user. This should be shown when the annotation is selected.

I don’t know if this is possible or what the best approach would be to develop this. Please let me know if you need any more information about this or what the best approach would be to achieve this.

Thanks in advance,
Kevin

1 Like

Hello, I’m AiRon, an automated tech support bot :robot:
While you wait for one of our customer support representatives, I can help you with your question.


To achieve the behavior you described, where a marker annotation is displayed when not selected and the original annotation is shown when selected, you’ll need to customize the annotation behavior in the WebViewer. This involves using the AnnotationManager to handle selection changes and possibly creating custom annotations to represent your markers.

Some things you can try:

  • Use the AnnotationManager to listen for selection changes on annotations.

  • Create a custom annotation or use an existing one as a marker for the default view.

  • Switch between the marker and original annotation when the selection changes.

  • Ensure that the logic for toggling between annotations is efficient to maintain performance.


Here are some resources that might help you:


Hopefully, this helps you solve your problem while you wait for a human to get back to you.

1 Like

Hi there,

The annotation on the left would be an image annotation, which you can use a Stamp annotation:
https://sdk.apryse.com/api/web/Core.Annotations.StampAnnotation.html#main
You can use the setImageData API for the StampAnnotation to replace the stamp with an avatar/image.

When a user selects the annotation, you can use the annotationSelected event and then delete the StampAnnotation, and replace it with a rectangle (or whatever of your choice) by creating it in that location.

You will want to keep these 2 annotations in memory/database so that you can always change it as the user selects/unselects the annotation.
You can use import/exportAnnotation APIs to handle this:

best regards,
Kevin

2 Likes

I’m using the stamp annotation at this moment with a custom draw function like this:

draw(ctx: CanvasRenderingContext2D, pageMatrix: AnyObject) {
        // the setStyles function is a function on markup annotations that sets up
        // certain properties for us on the canvas for the annotation's stroke thickness.
        this.setStyles(ctx, pageMatrix);

        // user avatar
        const thumbImg = document.createElement('img');
        ctx.translate(this.X, this.Y);

        // triangle
        ctx.beginPath();
        ctx.lineTo(0, 40);
        ctx.lineTo(45, 40);
        ctx.lineTo(0, 0);
        ctx.fillStyle = 'white';
        ctx.fill();

        //outer circle
        ctx.beginPath();
        ctx.arc(40, 0, 40, 0, 2 * Math.PI);
        ctx.fillStyle = 'white';
        ctx.fill();

        // primary color circle
        ctx.beginPath();
        ctx.arc(40, 0, 32, 0, 2 * Math.PI);
        ctx.fillStyle = 'white';
        ctx.fill();
        ctx.lineWidth = 4;
        ctx.strokeStyle = '#4093ff';
        ctx.stroke();

        //img
        thumbImg.src =
          'https://images.unsplash.com/photo-1733178262883-18a3080e7a5e?q=80&w=2574&auto=format&fit=crop&ixlib=rb-4.0.3&ixid=M3wxMjA3fDB8MHxwaG90by1wYWdlfHx8fGVufDB8fHx8fA%3D%3D';
        thumbImg.onload = function () {
          ctx.save();
          ctx.beginPath();
          ctx.arc(0, 0, 31, 0, Math.PI * 2, true);
          ctx.closePath();
          ctx.clip();

          ctx.drawImage(thumbImg, 50, 5, 80, 90);

          ctx.beginPath();
          ctx.arc(0, 0, 32, 0, Math.PI * 2, true);
          ctx.clip();
          ctx.closePath();
          ctx.restore();
        };
      }
    }

Using this method i’m not able to get the image inside the canvas. It gets loaded in the network tab but nothing is shown. Is there another way or am i doing something wrong? I tried with setImageData as well but nothing is happening with that method either.

Kind regards,
Kevin

1 Like

Hi there,

If you want to customize the draw function for a specific annotation, please use the setCustomDrawHandler function. Please see our guide for more details:

If you want to use setImageData with a stamp annotation, you will want to use it like this:

best regards,
Kevin

1 Like

Hi again,

So I’m trying to create a custom annotation with a custom draw handler like mentioned before. This is so we can draw the outer shape of the image as well as the image itself (as you can see on the first post). Drawing the outer shape of the image is not a problem and is already working.

However when I try to draw the image I get nothing displayed. I create an image dom element and use the onload function to draw the canvas image when the image is loaded by the browser. This is not working. I tried just drawing the image without the onload which is working but not all the time. (I guess it depends on the timing of the fetch done by the browser) There is also another problem with this method, when I try to crop the image it’s failing again (all the time now). I tried in a standalone project and in here everything is working as expected.

this is my custom draw handler function:

draw(ctx: CanvasRenderingContext2D, pageMatrix: AnyObject) {
        // the setStyles function is a function on markup annotations that sets up
        // certain properties for us on the canvas for the annotation's stroke thickness.
        this.setStyles(ctx, pageMatrix);

        ctx.translate(this.X, this.Y);

        // shadow color
        ctx.shadowColor = 'rgba(0, 0, 0, 0.25)';

        //outer circle
        ctx.beginPath();
        ctx.shadowOffsetX = 0;
        ctx.shadowOffsetY = 1;
        ctx.shadowBlur = 4;
        ctx.arc(20, 0, 20, 0, 2 * Math.PI);
        ctx.fillStyle = 'white';
        ctx.fill();
        ctx.shadowOffsetX = 0;
        ctx.shadowOffsetY = 0;
        ctx.shadowBlur = 0;
        ctx.closePath();

        // triangle
        ctx.beginPath();
        ctx.lineTo(0, 20);
        ctx.lineTo(22, 20);
        ctx.quadraticCurveTo(4, 14, 0, 0);
        ctx.fillStyle = 'white';
        ctx.fill();
        ctx.closePath();

        // primary color circle
        ctx.beginPath();
        ctx.arc(20, 0, 16, 0, 2 * Math.PI);
        ctx.fillStyle = 'white';
        ctx.fill();
        ctx.lineWidth = 2;
        ctx.strokeStyle = '#4093ff';
        ctx.stroke();
        ctx.closePath();

        //img
        const thumbImg = document.createElement('img');
        thumbImg.crossOrigin = 'anonymous';
        thumbImg.onload = function () {
          ctx.save();
          ctx.beginPath();
          ctx.arc(0, 0, 16, 0, Math.PI * 2, true);
          ctx.closePath();
          ctx.clip();

          ctx.drawImage(thumbImg, 24, 2, 40, 44);

          ctx.beginPath();
          ctx.arc(0, 0, 16, 0, Math.PI * 2, true);
          ctx.clip();
          ctx.closePath();
          ctx.restore();
        };
        thumbImg.src =
          'https://images.unsplash.com/photo-1742502570062-eb458e3e3a61?q=80&w=5346&auto=format&fit=crop&ixlib=rb-4.0.3&ixid=M3wxMjA3fDB8MHxwaG90by1wYWdlfHx8fGVufDB8fHx8fA%3D%3D';
      }

I feel like I’m really close to fixing this issue but I seem to be doing something wrong.
I also should include that we are working with the API in a standalone UI that we made ourselves. If this wasn’t clear before :slight_smile:
Is there a way to have this image cropped and with the onload function to work?
If you would like a minimal reproduction scenario I could take a look into making this in sandbox.

Thanks in advance!

Kind regards,
Kevin

1 Like

Hi there,

Using the createFromClass method from this guide:

I am able to see your annotation being created and the image being loaded via the network panel:

This was the snippet I used:


const CustomStampAnnotation = Annotations.CustomAnnotation.createFromClass('CustomStamp', Annotations.StampAnnotation);

const origDraw = CustomStampAnnotation.prototype.draw;

CustomStampAnnotation.prototype.draw = function (ctx, pageMatrix) {
  // draw(ctx, pageMatrix) {

  console.log('in draw');
  origDraw.apply(this, arguments);

  // the setStyles function is a function on markup annotations that sets up
  // certain properties for us on the canvas for the annotation's stroke thickness.
  this.setStyles(ctx, pageMatrix);

  ctx.translate(this.X, this.Y);

  // shadow color
  ctx.shadowColor = 'rgba(0, 0, 0, 0.25)';

  //outer circle
  ctx.beginPath();
  ctx.shadowOffsetX = 0;
  ctx.shadowOffsetY = 1;
  ctx.shadowBlur = 4;
  ctx.arc(20, 0, 20, 0, 2 * Math.PI);
  ctx.fillStyle = 'white';
  ctx.fill();
  ctx.shadowOffsetX = 0;
  ctx.shadowOffsetY = 0;
  ctx.shadowBlur = 0;
  ctx.closePath();

  // triangle
  ctx.beginPath();
  ctx.lineTo(0, 20);
  ctx.lineTo(22, 20);
  ctx.quadraticCurveTo(4, 14, 0, 0);
  ctx.fillStyle = 'white';
  ctx.fill();
  ctx.closePath();

  // primary color circle
  ctx.beginPath();
  ctx.arc(20, 0, 16, 0, 2 * Math.PI);
  ctx.fillStyle = 'white';
  ctx.fill();
  ctx.lineWidth = 2;
  ctx.strokeStyle = '#4093ff';
  ctx.stroke();
  ctx.closePath();

  //img
  const thumbImg = document.createElement('img');
  thumbImg.crossOrigin = 'anonymous';
  thumbImg.onload = function () {
    ctx.save();
    ctx.beginPath();
    ctx.arc(0, 0, 16, 0, Math.PI * 2, true);
    ctx.closePath();
    ctx.clip();

    ctx.drawImage(thumbImg, 24, 2, 40, 44);

    ctx.beginPath();
    ctx.arc(0, 0, 16, 0, Math.PI * 2, true);
    ctx.clip();
    ctx.closePath();
    ctx.restore();
  };
  thumbImg.src =
    'https://images.unsplash.com/photo-1742502570062-eb458e3e3a61?q=80&w=5346&auto=format&fit=crop&ixlib=rb-4.0.3&ixid=M3wxMjA3fDB8MHxwaG90by1wYWdlfHx8fGVufDB8fHx8fA%3D%3D';
}

And then I instantiate the custom annotation in the documentLoaded:

documentViewer.addEventListener('documentLoaded', async () => {
  const annot = new CustomStampAnnotation({
    PageNumber: 1,
    X: 50,
    Y: 50,
    Width: 100,
    Height: 25,
  });
  instance.Core.annotationManager.addAnnotation(annot);
  instance.Core.annotationManager.redrawAnnotation(annot);
});

It may be a timing issue on when you are loading the image to when you are calling your custom draw function. Please try it after the documentLoaded event.

best regards,
Kevin

1 Like

Forgive me if I’m wrong but this still doesn’t show the image right? it should show it in the drawing.

1 Like

Sorry about that, I was under the impression that the white circle was the image.

Because the annotation itself is under a canvas element and not inside the DOM, creating a element and setting the source will not work. Please try setting the stamp’s image via the setImageData API:
https://sdk.apryse.com/api/web/Core.Annotations.StampAnnotation.html#setImageData__anchor

best regards,
Kevin

1 Like

Hi,

I tried that before but it seemed that it was only possible to have an image without a draw function in that case. Is it possible to have a custom draw function together with the setImageData function?
Or is there a possible way of having the same outcome visualy as what i showed in one of the first screenshots for the user avatar annotation? I need to drawing around the image to make it look good in the UI.

So the questions I have:

  1. Is it possible to combine the setImageData function from the api together with the custom drawing? And in extension is it possible to become the desired outcome visualy as provided by the screenshot in the first comment of this thread
  2. If the first option is not possible, is it possible to only work with the setImageData function from the api and do some visualy changes to that? like making the image a circle, etc,…

Thanks in advance!

Kind regards,
Kevin

Thank you for your reply,

I was able to get the image and the custom draw function rendered together by setting the image outside of the draw function and separately with setImageData.

Please see revised snippet:

Same draw function but take out the element creation:

const CustomStampAnnotation = Annotations.CustomAnnotation.createFromClass('CustomStamp', Annotations.StampAnnotation);

        const origDraw = CustomStampAnnotation.prototype.draw;
        CustomStampAnnotation.prototype.draw = function (ctx, pageMatrix) {
          // draw(ctx, pageMatrix) {
          origDraw.apply(this, arguments);

          // the setStyles function is a function on markup annotations that sets up
          // certain properties for us on the canvas for the annotation's stroke thickness.
          this.setStyles(ctx, pageMatrix);

          ctx.translate(this.X, this.Y);

          // shadow color
          ctx.shadowColor = 'rgba(0, 0, 0, 0.25)';

          //outer circle
          ctx.beginPath();
          ctx.shadowOffsetX = 0;
          ctx.shadowOffsetY = 1;
          ctx.shadowBlur = 4;
          ctx.arc(20, 0, 20, 0, 2 * Math.PI);
          ctx.fillStyle = 'white';
          ctx.fill();
          ctx.shadowOffsetX = 0;
          ctx.shadowOffsetY = 0;
          ctx.shadowBlur = 0;
          ctx.closePath();

          // triangle
          ctx.beginPath();
          ctx.lineTo(0, 20);
          ctx.lineTo(22, 20);
          ctx.quadraticCurveTo(4, 14, 0, 0);
          ctx.fillStyle = 'white';
          ctx.fill();
          ctx.closePath();

          // primary color circle
          ctx.beginPath();
          ctx.arc(20, 0, 16, 0, 2 * Math.PI);
          ctx.fillStyle = 'white';
          ctx.fill();
          ctx.lineWidth = 2;
          ctx.strokeStyle = '#4093ff';
          ctx.stroke();
          ctx.closePath();

          //img
          // const thumbImg = document.createElement('img');
          // thumbImg.crossOrigin = 'anonymous';
          // thumbImg.onload = function () {
          //   ctx.save();
          //   ctx.beginPath();
          //   ctx.arc(0, 0, 16, 0, Math.PI * 2, true);
          //   ctx.closePath();
          //   ctx.clip();

          //   ctx.drawImage(thumbImg, 24, 2, 40, 44);

          //   ctx.beginPath();
          //   ctx.arc(0, 0, 16, 0, Math.PI * 2, true);
          //   ctx.clip();
          //   ctx.closePath();
          //   ctx.restore();
          // };
          // thumbImg.src =
          //   'https://images.unsplash.com/photo-1742502570062-eb458e3e3a61?q=80&w=5346&auto=format&fit=crop&ixlib=rb-4.0.3&ixid=M3wxMjA3fDB8MHxwaG90by1wYWdlfHx8fGVufDB8fHx8fA%3D%3D';
        }

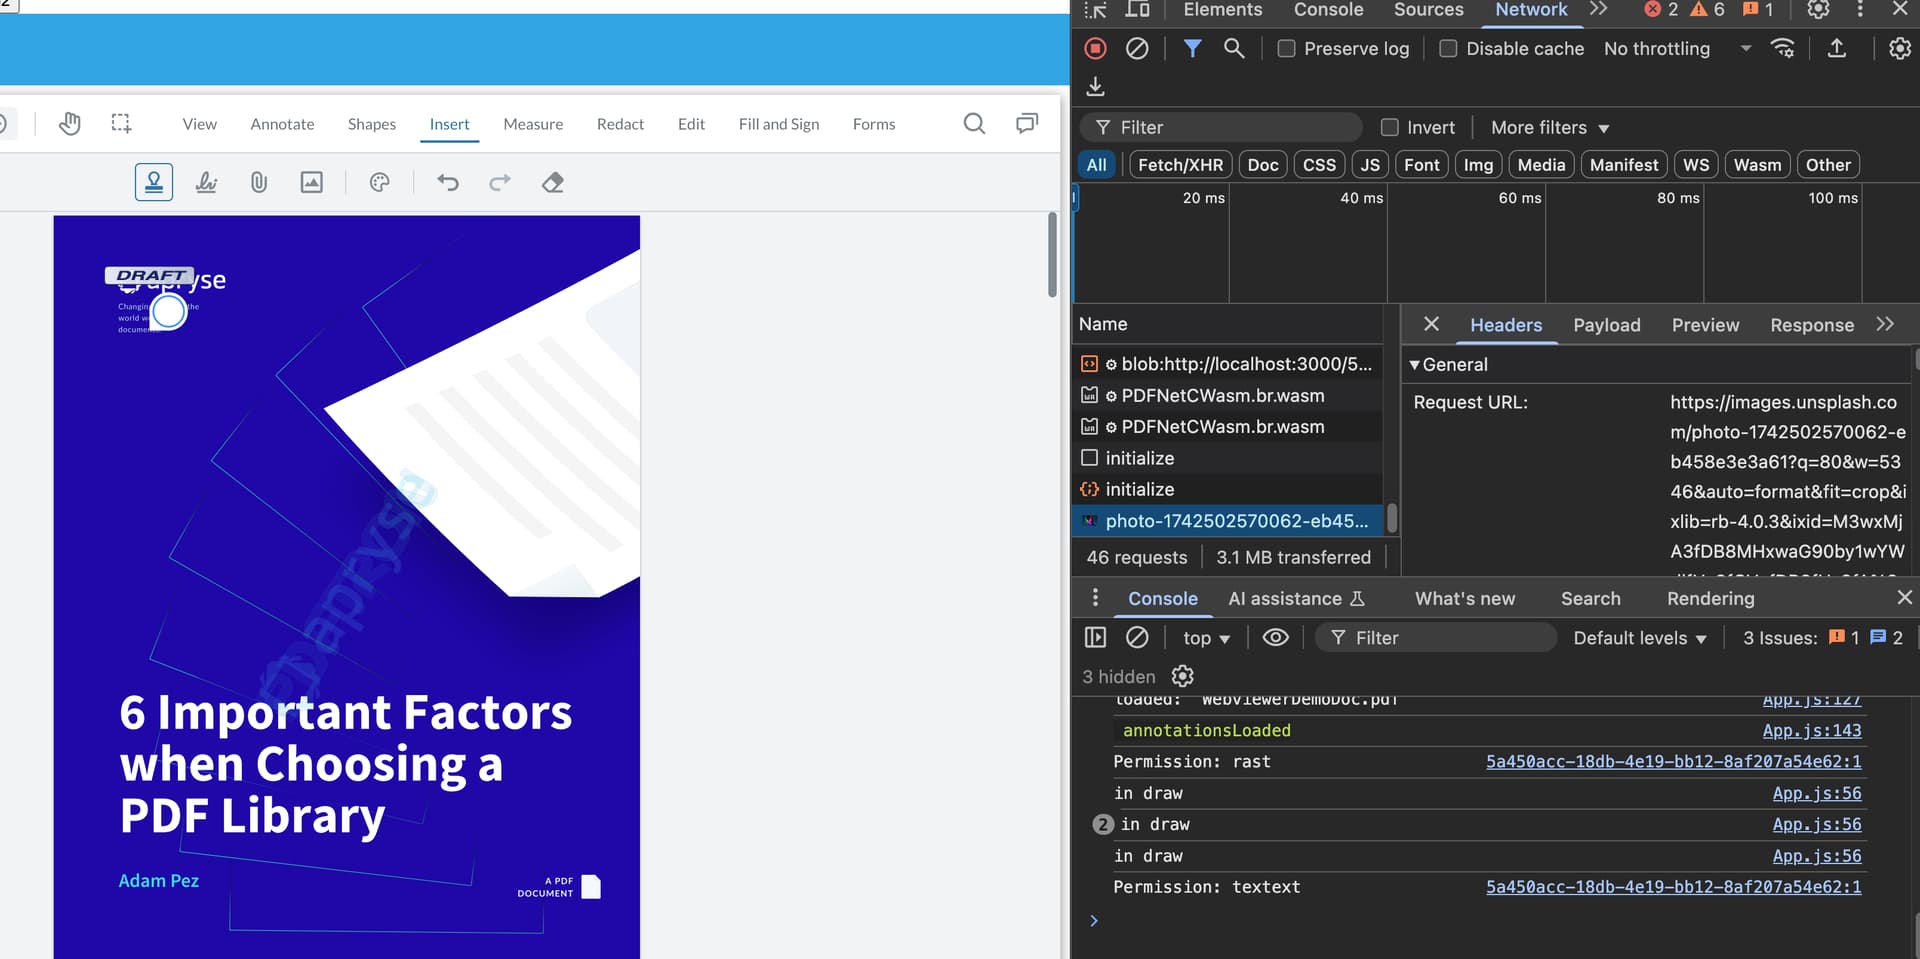
Create the custom stamp annotation, wait for the image to load, and convert it to imageDataURL and then set the stamp’s image via setImageData:

documentViewer.addEventListener('documentLoaded', async () => {

          const annot = new CustomStampAnnotation({
            PageNumber: 1,
            X: 50,
            Y: 50,
            Width: 100,
            Height: 25,
          });

          const thumbImg = document.createElement('img');
          thumbImg.crossOrigin = 'anonymous';
          thumbImg.src = 'https://images.unsplash.com/photo-1742502570062-eb458e3e3a61?q=80&w=5346&auto=format&fit=crop&ixlib=rb-4.0.3&ixid=M3wxMjA3fDB8MHxwaG90by1wYWdlfHx8fGVufDB8fHx8fA%3D%3D';

          thumbImg.onload = function () {
            const canvas = document.createElement('canvas');
            canvas.width = thumbImg.naturalWidth;
            canvas.height = thumbImg.naturalHeight;
            const ctx = canvas.getContext('2d');
            ctx.drawImage(thumbImg, 0, 0);

            const dataURL = canvas.toDataURL('image/png')

            annot.setImageData(dataURL);
          }
        
          instance.Core.annotationManager.addAnnotation(annot);
          instance.Core.annotationManager.redrawAnnotation(annot);
        });

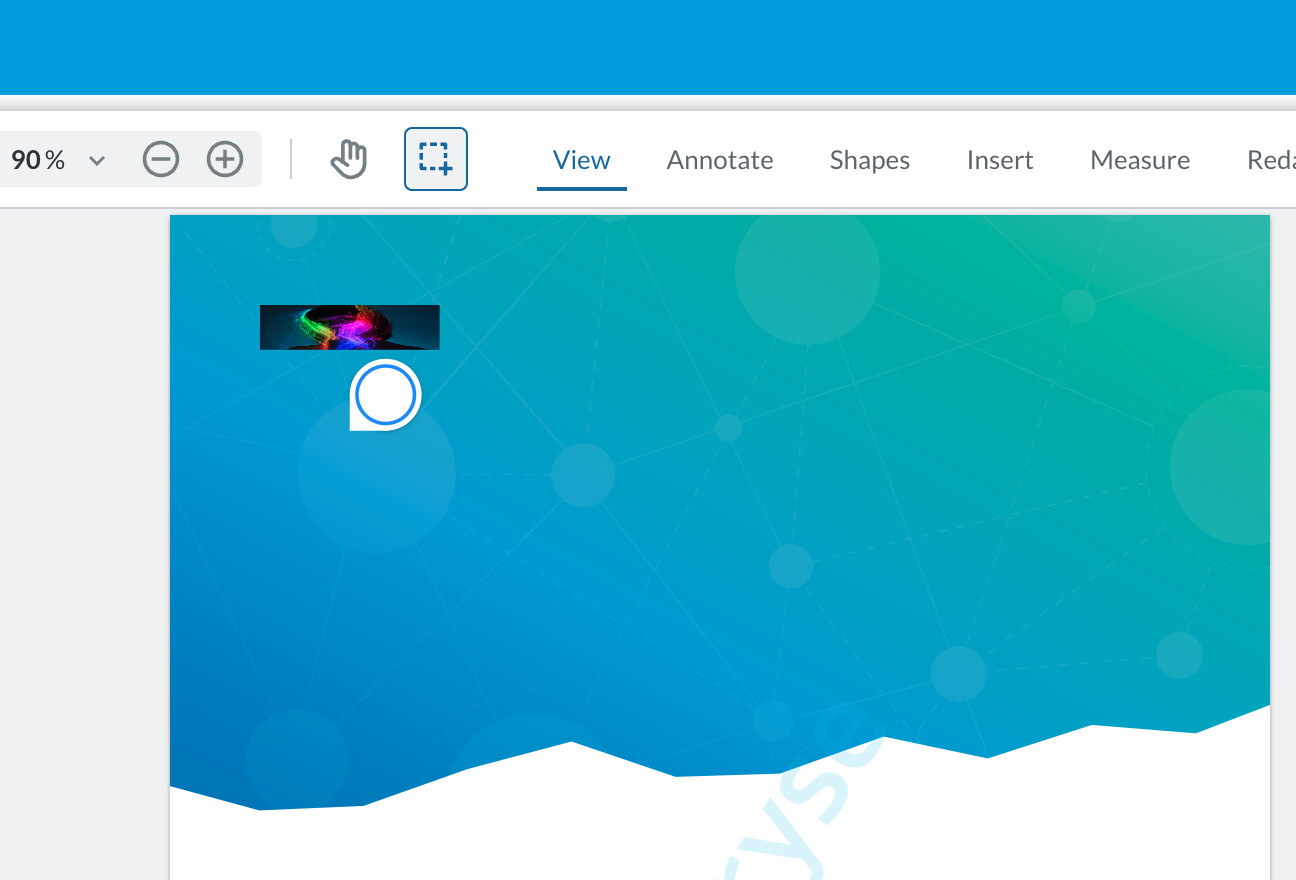
This is the final result:

best regards,
Kevin

1 Like

Hi,

Again I tried all what you suggested but still not the result I wanted.
Maybe let me go over everything I tried thus far:

  • Create custom annotation:

    • with custom draw annotation: was not able to show the image in the canvas element. But was able to create the shape needed for the annotation
    • with setImageData function: Was able to show the image by itself but not the shape needed for the annotation
    • Combination of the 2: the image was not visible
  • Create custom stamp annotation:

    • with custom draw annotation: was not able to show the image in the canvas element. But was able to create the shape needed for the annotation
    • with setImageData function: Was able to show the image by itself but not the shape needed for the annotation
    • Combination of the 2: the image was not visible
  • Tried 2 canvas elements but was unable to create the shape I needed together with the image.

Now, You told me it could be related to a timing issue with the documentViewer not being loaded yet or not so i put everything related to adding the annotation to the canvas in the documentLoaded event listener and it still didn’t show the image in the end.


This is an example of how the annotation should look in reality.
The inner most circle with the image (everything inside the bleu circle) is the only thing that is part of the image fetched from an external URL. The rest is not part of that image and should be made visible in some sort of way. The annotation should be selectable but the selection should not be visible. the user should not be able to change the dimensions of the annotation. All of our annotations are readonly.

Could it be possible to get an example of code snippets that has this result in the end? Because all of the examples you gave me in the past did not in fact have this UI. Either it was only the image or the shape of it only but never combined in the correct spot. I always tried to change the snippets you gave me to fit my needs but without any luck.

So I would like a complete example of how to become everything I want with code snippets please.

Kind regards,
Kevin

1 Like

Hi there,

I couldn’t quite get the annotation selection correct with the page matrix, but the image can be drawn inside of the circle.

Please see the following snippet:

const CustomStampAnnotation = Annotations.CustomAnnotation.createFromClass('CustomStamp', Annotations.StampAnnotation);

const origDraw = CustomStampAnnotation.prototype.draw;
CustomStampAnnotation.prototype.draw = function (ctx, pageMatrix) {
  const imageUrl = 'https://images.unsplash.com/photo-1742502570062-eb458e3e3a61?q=80&w=5346&auto=format&fit=crop&ixlib=rb-4.0.3&ixid=M3wxMjA3fDB8MHxwaG90by1wYWdlfHx8fGVufDB8fHx8fA%3D%3D';

  const image = new Image();
  image.crossOrigin = 'anonymous'; // Optional, useful if image is from another domain

  image.onload = () => {
    console.log('Image Loaded');

    const x = 100; // Image top-left X
    const y = 100; // Image top-left Y
    const width = 100;
    const height = 100;

    const centerX = x + width / 2;
    const centerY = y + height / 2;
    const radius = Math.max(width, height) / 2 + 10; // radius slightly bigger than image

    // Draw outer circle
    ctx.beginPath();
    ctx.shadowOffsetX = 0;
    ctx.shadowOffsetY = 1;
    ctx.shadowBlur = 4;
    ctx.arc(centerX, centerY, radius, 0, 2 * Math.PI);
    ctx.fillStyle = 'white';
    ctx.fill();
    ctx.shadowOffsetX = 0;
    ctx.shadowOffsetY = 0;
    ctx.shadowBlur = 0;
    ctx.lineWidth = 3;
    ctx.strokeStyle = 'red';
    ctx.stroke();
    ctx.closePath();

    // Draw triangle (downward arrow)
    ctx.beginPath();
    ctx.moveTo(centerX - radius / 2, centerY + radius);
    ctx.lineTo(centerX + radius / 2, centerY + radius);
    ctx.lineTo(centerX, centerY + radius + 10); // arrow head
    ctx.fillStyle = 'red';
    ctx.fill();
    ctx.closePath();

    // Draw inner circle (avatar boundary)
    ctx.beginPath();
    ctx.arc(centerX, centerY, radius - 10, 0, 2 * Math.PI);
    ctx.fillStyle = 'white';
    ctx.fill();
    ctx.lineWidth = 2;
    ctx.strokeStyle = '#4093ff'; // Blue border for inner circle
    ctx.stroke();
    ctx.closePath();

    // Clip the drawing region to the circle to constrain the image inside it
    ctx.save(); // Save the current context state
    ctx.beginPath();
    ctx.arc(centerX, centerY, radius - 10, 0, 2 * Math.PI); // Clip to inner circle
    ctx.clip();

    ctx.drawImage(image, x, y, width, height);

    // Restore the context state to stop clipping
    ctx.restore();
  };

  image.src = imageUrl;
};

documentViewer.addEventListener('documentLoaded', async () => {

  const annot = new CustomStampAnnotation({
    PageNumber: 1,
    X: 100,
    Y: 100,
    Width: 100,
    Height: 100,
  });

  instance.Core.annotationManager.addAnnotation(annot);
  instance.Core.annotationManager.redrawAnnotation(annot);
});

This results in the image drawn on top of the circle and within its boundaries:

best regards,
Kevin

1 Like

Hi,

Sorry for bothering again. It seems like I’m unable to get the same result as you have. It looks like it is working as expected on your end. However, It looks like I’m clearly doing something wrong on my end. I was wondering if it is possible to share the whole code for this example in maybe a codesandbox or playground. that way I can cross reference what you are doing and what I’m doing and can find out what I’m doing wrong. I do have to mention that I’m working in a react ecosystem environment and I think it probably has something to do with timing issues in here, but I can’t seem to find out exactly where.

Thanks in advance!

kind regards,
Kevin

1 Like

Hi there,

It looks like this works on a react-JavaScript sample, but not on the TypeScript sample. Please see the zip file here for reference:
webviewer-react-sample-customDraw.zip

You can run npm i and npm start to run the sample.

As mentioned before the image renders but the selection is inaccurate and will require pageMatrix adjustments.

best regards,
Kevin

1 Like

Hi,

For people coming to this thread and having the same issue as me, I managed to fix it by altering the solution provided by @kkim. I changed the prototype draw function of the created custom annotation class in the onload function of the image. This way I’m sure the image was loaded when executing draw function, in the same onload function I add the new created custom annotation class the to annotationmanager by using the registerAnnotationType, afterwards I create an annotation from the new class and add and redraw it.

example code:

export const drawAnnotationAvatar = (
  annotationManager: Core.AnnotationManager,
  pdftronInstance: Core.DocumentViewer,
  annotation: Annotation,
  importedAnnotation: Core.Annotations.CustomAnnotation,
  imageUrl?: string | null,
) => {
  const { Core } = window;

  const AnnotationClass = Core.Annotations.CustomAnnotation.createFromClass(
    `userAvatar-${annotation.communication.author.name}-annotation-${annotation.communication.author.id}`,
    Core.Annotations.StampAnnotation,
  );

  const image = new Image();
  image.onload = () => {
    AnnotationClass.prototype.draw = function (ctx: CanvasRenderingContext2D, pageMatrix: any) {
      const width = 30;
      const height = 30;
      const extraRadius = 5;
      //Need to extract the zoom level from the pdftronInstance in here because onload is not called in the same context as the pdftronInstance update
      const zoomLevelMultiplier = pdftronInstance.getZoomLevel();

      // Calculate the center position of the annotation
      ctx.translate(
        importedAnnotation.X + extraRadius + (importedAnnotation.Width * zoomLevelMultiplier) / 2,
        importedAnnotation.Y - extraRadius - height + (importedAnnotation.Height * zoomLevelMultiplier) / 2,
      );

      const centerX = width / 2;
      const centerY = height / 2;
      const radius = Math.max(width, height) / 2 + extraRadius; // radius slightly bigger than image

      // Draw outer circle
      ctx.beginPath();
      ctx.shadowOffsetX = 0;
      ctx.shadowOffsetY = 1;
      ctx.shadowBlur = 4;
      ctx.arc(centerX, centerY, radius, 0, 2 * Math.PI);
      ctx.fillStyle = 'white';
      ctx.fill();
      ctx.closePath();

      // Draw triangle
      ctx.beginPath();
      ctx.moveTo(centerX - radius, centerY);
      ctx.lineTo(centerX - radius, centerY + radius);
      ctx.lineTo(centerX, centerY + radius); // arrow head
      ctx.fillStyle = 'white';
      ctx.fill();
      ctx.closePath();

      // Draw inner circle (avatar boundary)
      ctx.beginPath();
      ctx.arc(centerX, centerY, radius - extraRadius, 0, 2 * Math.PI);
      ctx.fillStyle = 'white';
      ctx.fill();
      ctx.lineWidth = 3;
      ctx.strokeStyle = '#4093ff'; // Blue border for inner circle
      ctx.stroke();
      ctx.closePath();

      // Clip the drawing region to the circle to constrain the image inside it
      ctx.save(); // Save the current context state
      ctx.beginPath();
      ctx.arc(centerX, centerY, radius - extraRadius, 0, 2 * Math.PI); // Clip to inner circle
      ctx.clip();

      ctx.drawImage(image, 0, 0, width, height);

      // Restore the context state to stop clipping
      ctx.restore();
    };
    annotationManager.registerAnnotationType(AnnotationClass.prototype.elementName, AnnotationClass);
    const annot = new AnnotationClass({
      PageNumber: importedAnnotation.PageNumber,
      X: importedAnnotation.X,
      Y: importedAnnotation.Y,
      Width: importedAnnotation.Width,
      Height: importedAnnotation.Height,
      NoZoom: true,
      NoRotate: true,
      NoResize: true,
    });
    annotationManager.addAnnotation(annot);
    annotationManager.redrawAnnotation(annot);
  };
  image.src = imageUrl ?? ''; // Set the image source
};

However, I still have one issue with this. I’m still unable to select the annotation that was newly created. Is there a way to make the annotation selectable? I added an event listener to the annotation manager with the event ‘annotationSelected’ but it seems like it never comes in here.
Could you maybe alter the code I provided above in the draw function to make it so that the selection works?
Thanks in advance!

Kind regards,
Kevin

1 Like